ACRONAUT
An old-school SNES style platform game built in Unity
DOWNLOAD THE GAME HERE:
Build for Windows
Build for Mac OSX
Build for Linux
Note: Results may vary — OSX and Linux builds are entirely untested.
For the best experience, use the XBox 360 Controller.
Watch a playthrough:
This was a project I worked on for my "traditional game development" class in the University of Utah's EAE program.
This was my first time working in Unity, and it was a lot of fun!
The team was:
Adam Kay: design and programming
Michael Biggs: programming
Isaac Pickering: art
Kim Merino: art
Since we were such a small team, we all had to wear many hats. We all did some level design, and I programmed a whole lot of different parts of the game — including most of the gameplay as well as the camera. I even got to dip into a little sound design and helped get the animations working right.
The goal of the game was to make a retro SNES-style platformer, heavily focusing on the movement of the character. So heavily in fact, that there aren't even enemies or a way to die in the game. You are, however, racing against a clock... Basically the idea is to get through the level as fast as you can — and look cool doing it!
The main inspiration for the movements came from the Megaman X and Megaman Zero series of games. In those games you have a few particularly unique moves — a dash, an air dash, and a wall jump/dash. We tried to recreate these moves, and added a few new ones in the same spirit.
The controls are quite simple — we simply have the four directional arrows on the D-Pad, a jump button (A on the XBox controller), and a "trick" or dash button (X on the XBox controller). Those are all of the buttons we use, but in different combinations, there are quite a lot of moves!
Following is a walkthrough of some specific aspects of the game I worked on.
UPDATE LOOP
First of all, let's look at the UPDATE loop, and how basic movement works.
Note: I have a separate script (PlayerPhysics) that handles my custom physics. Unity's built-in 2D physics didn't seem to be up to the task of getting the feel we were going for, so I implemented a custom physics/collision system based on raycasting. Most of this was taken from The Deranged Hermit, so I won't cover it here. Check that blog out if you want to do something like this yourself.. it's a pretty cool resource.
OK, on to the update loop...
GRAVITY
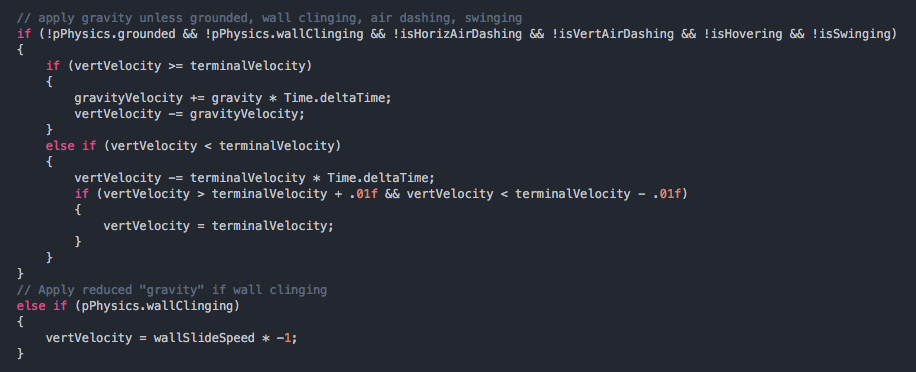
Here is where I apply gravity. Gravity is a force — i.e. it persists across update loops. A little bit of gravity is added each loop... so if you are falling, you will speed up as you fall.
There is a "terminal velocity" variable which maxes out the speed of gravity, so it doesn"t get out of control!
Note "vertVelocity" is also a force that persists across update loops. There is also a corresponding "horizVelocity", which is a force as well, and later we'll see "horizTranslation", which is NOT a force that persists. It is set from scratch every loop. The combination of these 3 controls the player's movement, and gives enough flexibility to get the classic platformer feel right.
While we're here, notice how we get the wall slide move, we just set the vertical velocity to a different custom value.

GROUND RESISTANCE
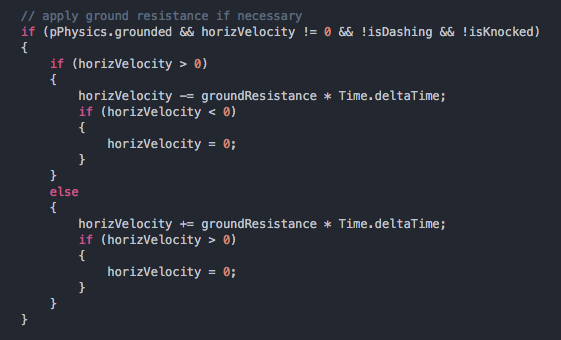
Here I apply some ground resistance. Essentially the idea is just to add some resistance to the horizontal velocity, simulating friction.
If you wanted to make an ice level or something, you could simply adjust the "groundResistance" value!
HORIZONTAL INPUT
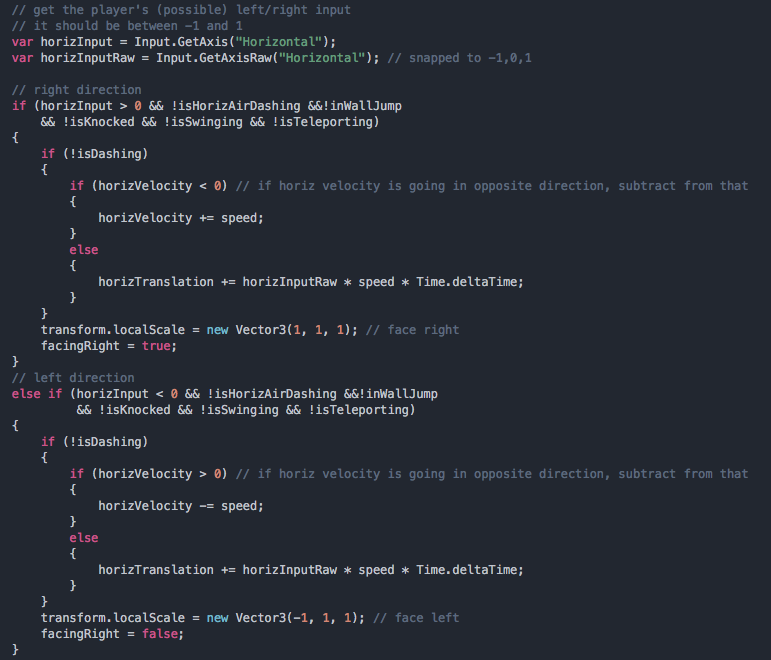
Here's where we get the player's horizontal input and apply it as necessary.
For the most part we are using "AxisRaw" which snaps the axis value to -1, 0, or 1, so an analog joystick will behave the same as a D-Pad.
As I mentioned before there are two different variables that deal with horizontal movement: "horizVelocity" (which persists across update calls) and "horizTranslation" (which is reset every loop). "HorizTranslation" is simply calculated as the raw input multiplied by "deltaTime" and the speed.
"HorizVelocity" is used when you have momentum, and switch directions. This is noticeable when interacting with an object that moves you around (such as a bumper which I'll discuss later).
FINAL MOVE

Here we see the final move being called, with the 3 different movement variables.
The Move function in my PlayerPhysics script does a lot of collision detection and bookkeeping, but at its core is a call to transform.Translate.
JUMP — DOUBLE JUMP

Jump is pretty simple, is simply requires adding in "jumpSpeed" to "vertVelocity".
Note the "KillJump" function, which is mainly used when the player lets go of the jump button (this is very important to the platformer feel we're going for).
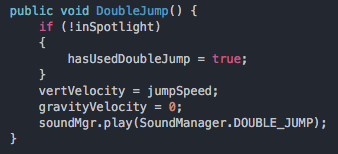
No platformer is complete without double jump!
This is basically the same as jump, but with some additional bookkeeping.
We have to set "gravityVelocity" to zero to get the same feel that you get from jumping off the ground, since a double jump happens from the air.
HOVER
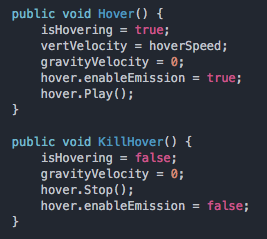
Hover temporarily disables gravity and sets "vertVelocity" to a constant value.
After the timer runs out (or the player releases the jump button), "KillHover" will be called.
DASH
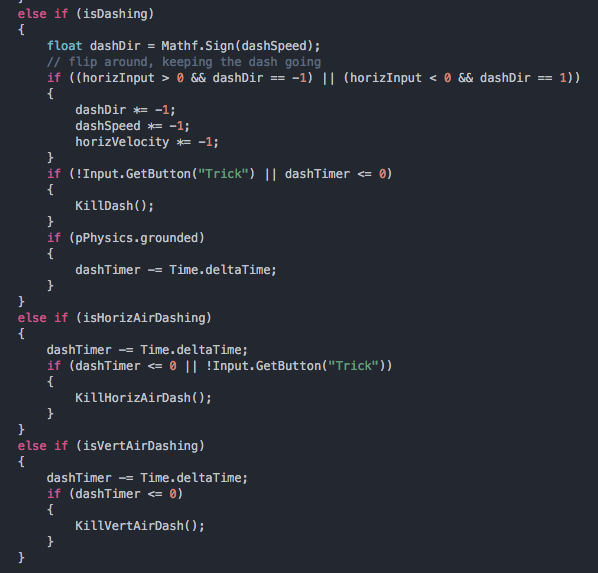
A lot of platformers have a mechanic where if you hold down a "run" button, then your movement is faster. For our game though, we were going for the Megaman dash, which doesn't really involve horizontal input.
Basically it works as follows:
- You hit the dash button, and you'll start moving at dash speed in the direction you're facing.
- The dash is timed, and you have to keep holding the dash button to keep it going. So the dash is canceled when the timer runs out, or when you let go of the button, whichever happens first.
- You can switch directions in the middle of a dash by pressing the direction button in the opposite direction that you are dashing.
HORIZONTAL AIR DASH — VERTICAL AIR DASH
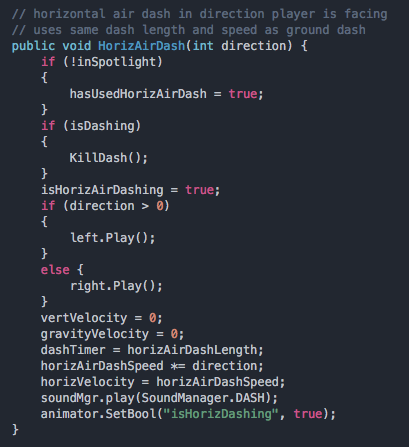
This works almost exactly the same as ground dash — except we don't allow you to change directions in the middle of it.
The other main difference is that we set gravity to zero, and cancel any horizontal velocity as well.
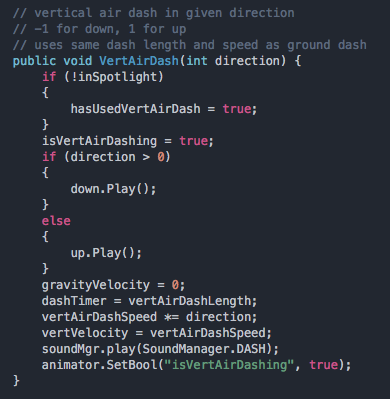
This works the same as horizontal air dash, except we apply it to vertical velocity instead of horizontal.
Additionally we require the player to hold either the up or down directional button — otherwise you are going to do a horizontal air dash.
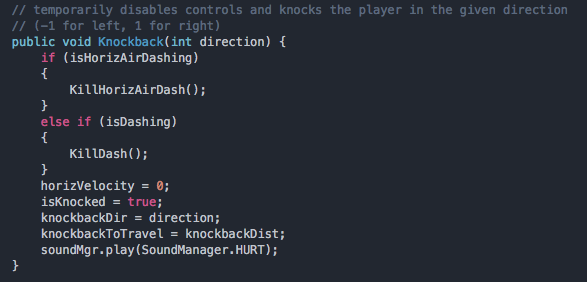
KNOCKBACK
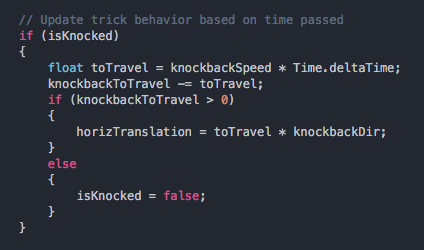
In update:
Knockback happens when the player runs into certain obstacles. The player will temporarily lose control, as they are knocked back away from the direction they were going.
When the collision is detected and the Knockback function is called, the opposite direction of the direction the player is moving is passed in.
Then, in the update method we move the player back a certain amount based on knockback speed. Instead of using a timer, I'm subtracting from a total amount, "knockbackDist" (adjustable in the inspector) — this makes it easier to adjust and tweak to the designer's liking.
WALL JUMP

This was one of the trickier mechanics to implement. It's kind of hard to explain how it works, but it's essentially lifted from the wall jump in Mega Man games.
It is a jump that happens when you are clinging to a wall, and it launches you off the wall in a sort of triangular direction — so both horizontal and vertical velocities come into play.
There is a "wallJumpAngle" that is configurable, and a little bit of trigonometry to set the velocities.
WALL TRICK JUMP
Additionally there is a "tricked" form of the wall jump — which happens when you are holding down the trick (dash) button.
It operates in essentially the same way, but you jump out a little farther.
BUMPER
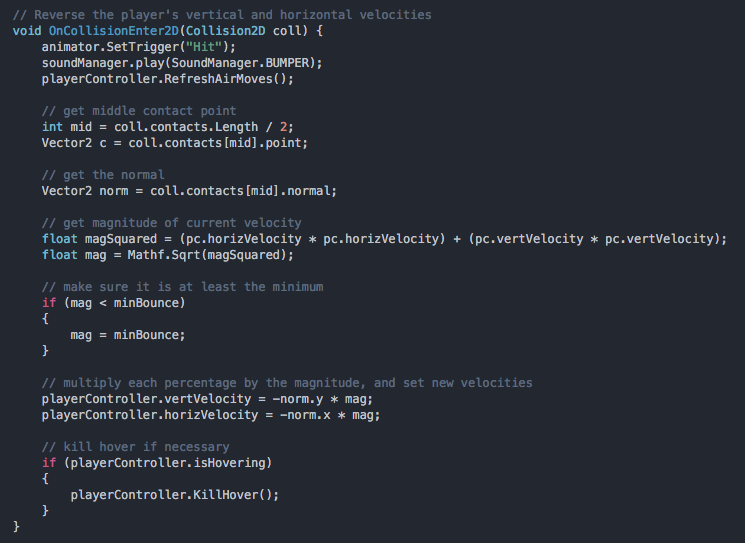
Acronaut has a number of different obstacles in the game, but an interesting one is the bumper.
This is sort of inspired by the pinball bumpers in Sonic the Hedgehog. The idea is that when you hit them, you bounce back in the direction you hit them, multiplied by your velocity.
As opposed to Knockback, which only takes into account horizontal motion, the bumpers need to work in both directions. So I'm using the Pythagorean Theorem to get the directional magnitude of the player's velocity.
We get the direction to move back in by taking the normal of the middle point of contact between the player and bumper colliders.
CAMERA
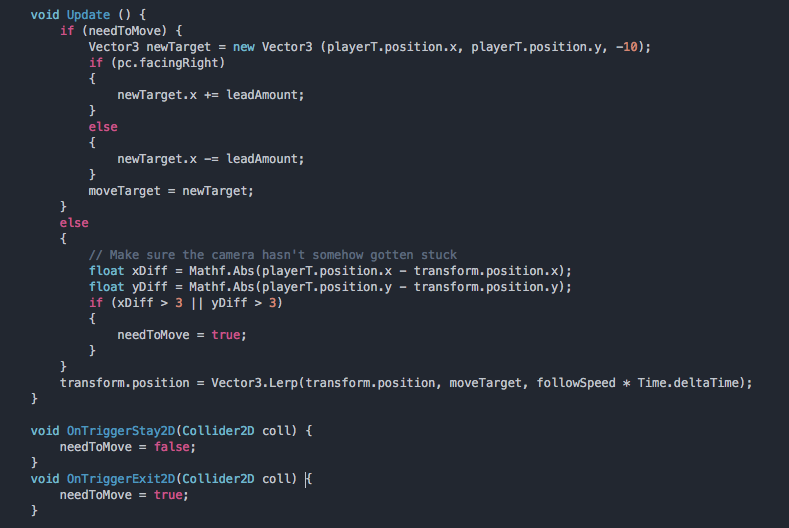
Finally, let's take a look at the camera. The way the camera moves is really important for the feel of the game, and it can be a bit tricky to get right. In fact, this is what I was working on all the way up until we had to turn the game in. There were some subtleties I never quite nailed, but I think I got the movement working decently well in most cases.
The main game I looked at was Super Mario World— in that game you have a little bit of leeway where you can move a certain distance left/right or up/down, and the camera doesn't move. My goal was to do something as close to this as possbile.
So we set up a collider (attached to the camera) like so:
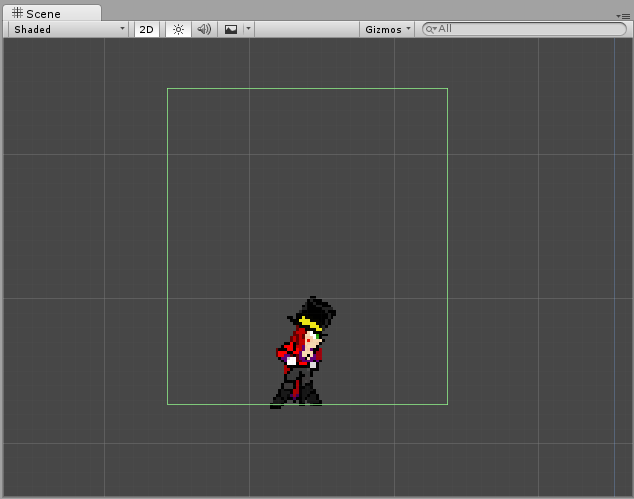
If the player is inside the collider, the camera won't move at all. As soon as the player starts to leave the collider, the camera moves toward the player — adjusted by a "lead amount" in the x direction that we can specify.
Due to some cases where the player moves extremely fast (cannons, teleportation hats, etc.) the camera would sometimes lose the player, so I also put in a few lines that make sure the camera moves to the player if the player and camera are far away from each other.